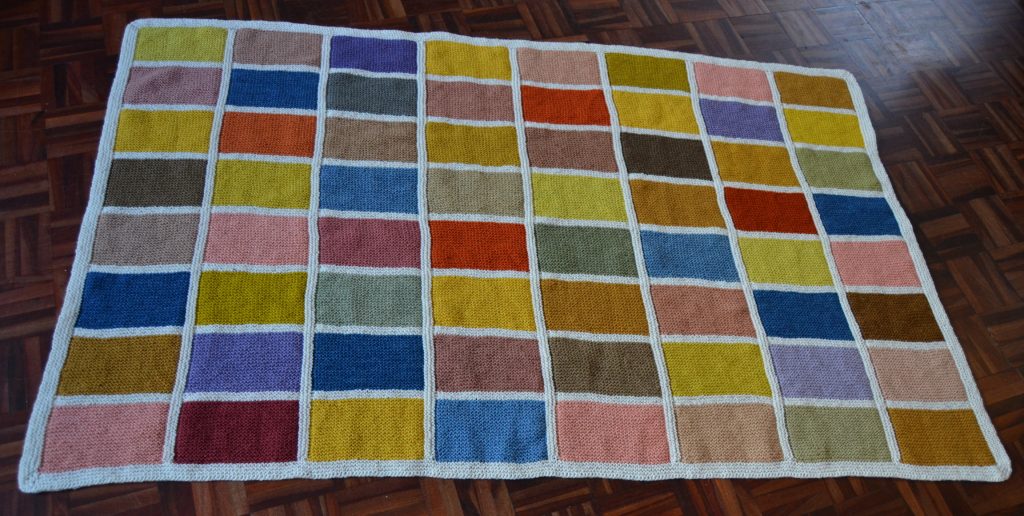
My big blanket made of test skeins is done – I’m so happy with the way it turned out!! Here is the entire blanket. I know you can’t tell from such a photo, but it’s quite large, 96 x 150 cm (38 x 59 inches).

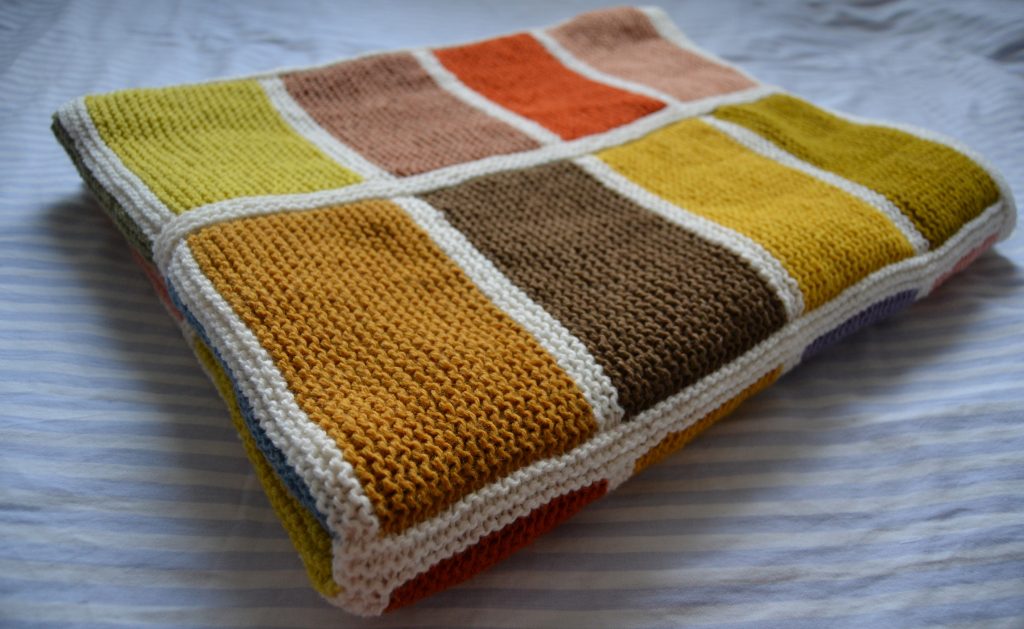
And a couple of closer views. I took lots of pictures of it because I’m really very happy with it (I’m actually wrapped in it as I write these words).

I knit my blanket out of all my 10 g test skeins that I use for trying out new dyestuffs and for trying out different variations. The yarn is supersoft wool (575 m/100 g) knit double on a 4.5 mm needle. The skeins were dyed with:
- Cortinarius semisanguineus
- Privet berries
- Mixed Cortinarius mushrooms
- Dyer’s polypore
- Earthballs
- Velvet pax
- Ischnoderma benzoinum
- Fern
- Fermented avocado pits and peels
- Tansy flowers
- Apple leaves
- Reed flowers
- Coreopsis
- Logwood
- Madder
- Indigo
I used about 9 grams of yarn for each window, and about 200 grams of white yarn for the window frames and edge.
Vindauga (meaning wind-eye) is the Old Norse word for window. I chose that name for my blanket because it consists of windows of different natural colors.
I knit my blanket in an incredibly complicated way, but now I’ve reduced my notes to a set of instructions that are rather simple with one exception: you need to graft rather long stretches together. Some find grafting complicated. It’s true that it seems complicated when you first learn it, but I find the technique indispensable for nice finishing.
Strips, make 8
Provisionally cast on 32 sts. Lefties can see my tutorial, right-handed people can watch this video.
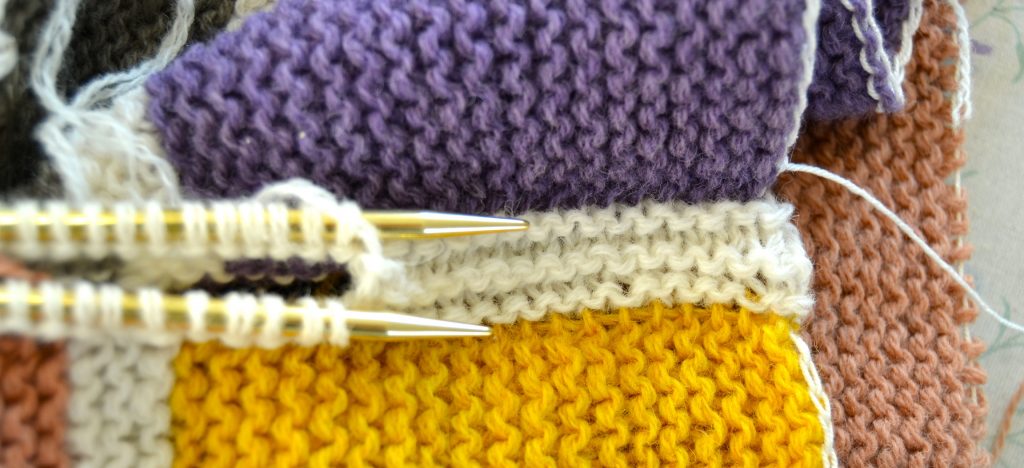
Knit 19 ridges of garter stitch with one color. This will give you a rectangle that (more or less) has the golden proportion, which pleases the eye. My rectangles measure about 10 x 17 cm (4 x 6.75 inches).
Using a back join, change to white yarn and knit 3 ridges (the window frame).
Change to a new color (back join again) and knit 19 ridges.
Continue knitting 3 white and 19 color ridges until you have 8 windows of 19 ridges each, separated by 7 white window frames of 3 ridges each. Put the stitches on a piece of scrap yarn and save them for later.

Grafting Strips Together
When you have knit 8 strips, you will graft them together (or you can begin grafting as soon as you’ve finished 2 strips). Here is how to graft one strip (A) onto a larger piece that has already been put together (B). A is on top in this picture and B on the bottom. The provisional cast on of each strip is on the left.
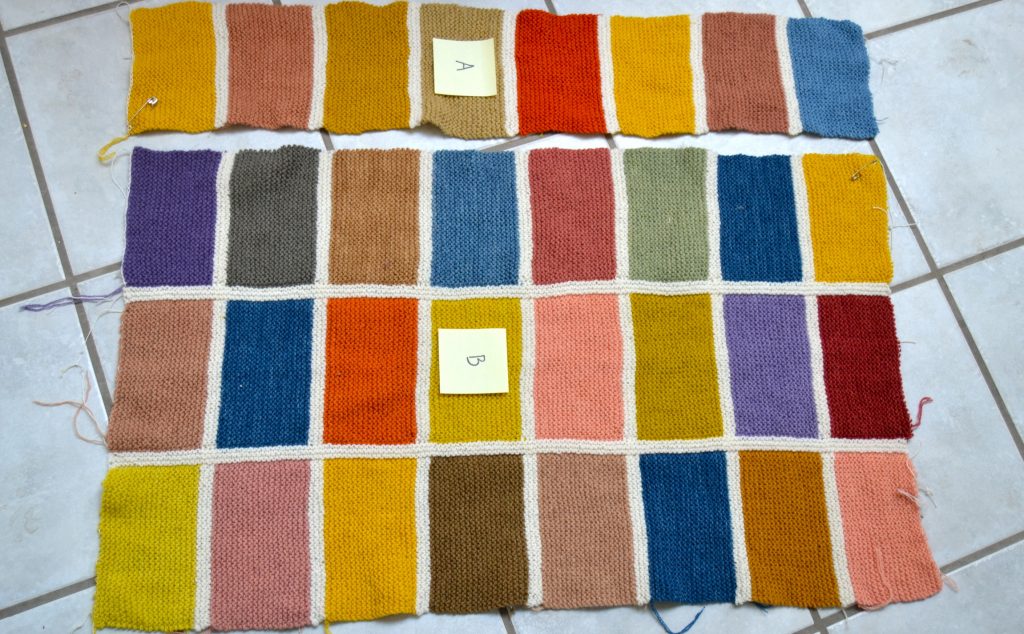
Begin with strip A. Begin picking up stitches in the corner closest to the provisional cast on (yellow rectangle marked with a safety pin) and pick up one stitch in each garter bump (finishing at the blue rectangle).
Pass the last stitch you pick up over the next to last (1 stitch decreased).
Turn the work and knit all the stitches. In the last stitch, work a kfb (1 stitch increased). The reason for decreasing and increasing is to shift things slightly so the window frames line up. Cut yarn and secure the end.
Now, it’s strip B. Begin picking up stitches in the corner furthest away from the provisional cast on (yellow rectangle with safety pin). Pick up one stitch in each garter bump all the way, ending at the purple rectangle.
Knit 2 rows and cut yarn, leaving a 4 m long tail (you will use it for grafting).

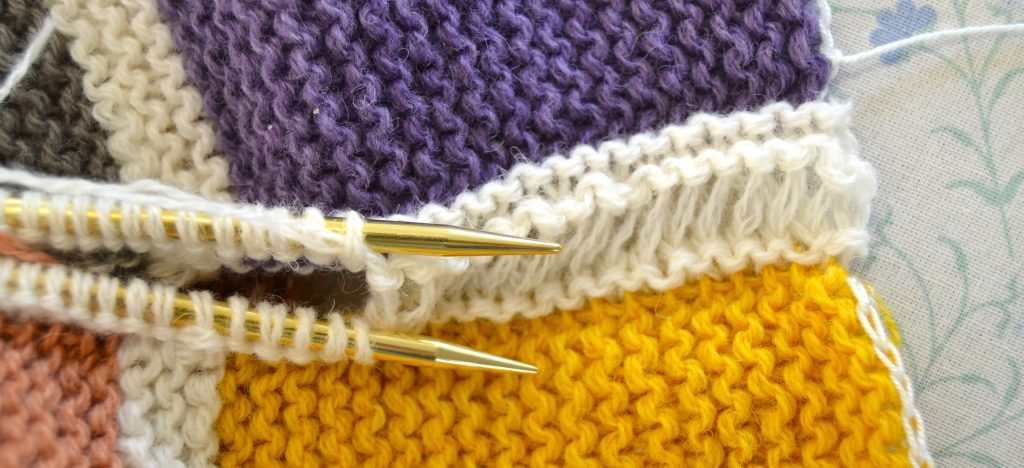
Now comes the difficult part. Here are the A and B pieces oriented in the same way as above, just seen closer. The long tail is attached to the purple rectangle (strip B).

Turn the B piece so it has the wrong side up. Put the A piece on top, with the right side up. Now, the pieces are positioned correctly to start grafting, the bumps of the garter stitches are facing upwards on both pieces.

First, sew purlwise into the first stitch on the top (yellow) piece. Pull yarn through, leaving the stitch on the needle.
Then, sew purlwise into the first stitch on the bottom (purple) piece. Pull yarn through, leaving the stitch on the needle.
Now, start working the two steps that you will repeat the rest of the way:
Sew knitwise into the first stitch on the top piece, letting the stitch fall off the needle. Sew purlwise into the next stitch, leaving it on the needle,
Sew knitwise into the first stitch on the bottom piece, letting the stitch fall off the needle. Sew purlwise into the next stitch, leaving it on the needle.
You can also see this picture tutorial.
I just graft loosely to begin with, focusing on passing through the stitches the right way. Then, I tighten up the stitches so this:
becomes this:
When you reach the end, and only have one stitch left on each needle, you just sew knitwise into each of them.
Graft all 8 strips together in the same way.
Edge
Now, it’s time to knit on the edge. It’s very long indeed, so I used my interchangeable needles with two cables put together.
Begin at a corner and pick up stitches all the way around the blanket, one stitch in each garter bump. Make increases at the corners, before and after the corner, also on the round where you pick up the stitches. So: when 1 stitch remains before a corner, m1r (increase by picking up the thread that links the stitches, from the back). Knit 2 stitches, then m1l (increase by picking up the thread that links the stitches, from the front)
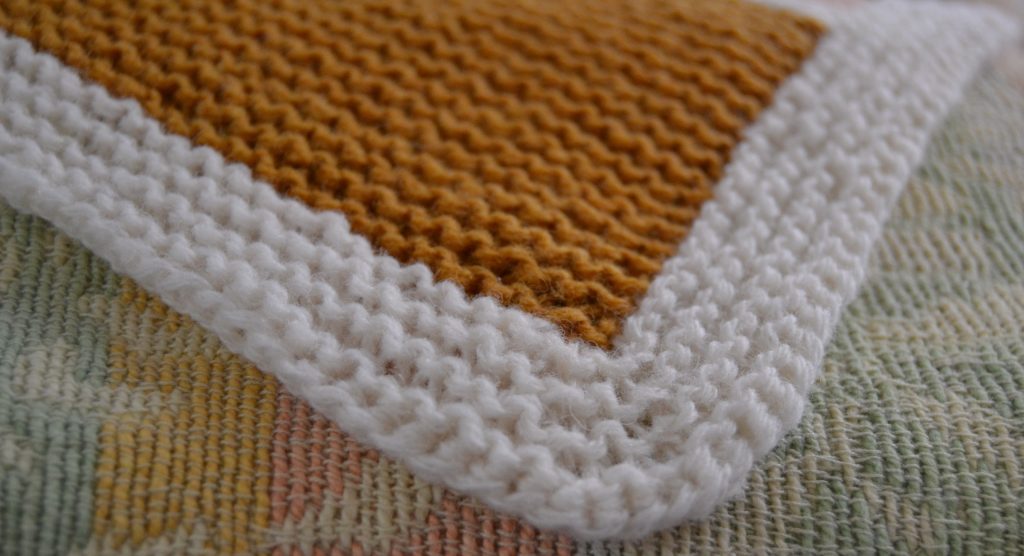
Purl one round, then knit a round with increases at the corners. Continue like that until you have 4 ridges of garter, ending with a purl round.
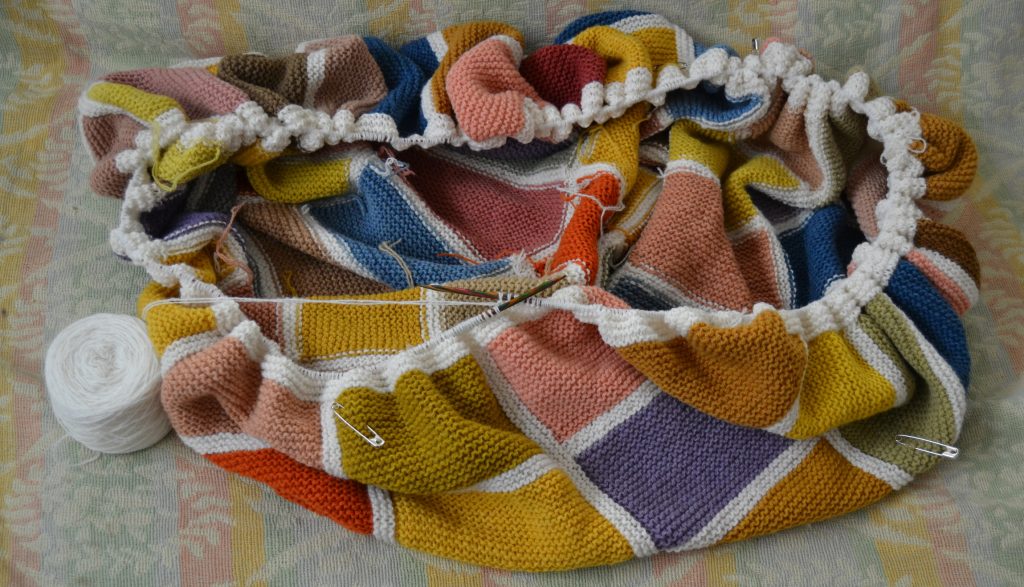
Cast off: I used Jeny’s stretchy bind off all the way around the blanket, and that worked nicely. I did corner increases on the bind off round, because tight corners are the worst. This way of doing them gives them a nice, relaxed appearance.
That’s it! If anybody out there tries out this pattern, I’d love to see pictures of your FO.
You can obviously change the yarn and needle size, stitch count, number of strips you put together, width of the strips and of the frame….
[…] Vindauga-princippet, hvor strimler af retstrikning samles med rammer af maskesting, vil heller ikke rigtig lade min hjerne være i fred. Jeg arbejder på en version, hvor hver rude er stribet, og den er strikket i Fenris 100% uld (450 m/100 g) på pind 3,5. […]
[…] jeg tænkte på Fibonacci-tal var da jeg skulle regne de rigtige tal ud til mit Vindauga-tæppe hvor rektanglerne overholder det gyldne forhold, som kan approximeres ved forholdet mellem naboer i […]
[…] fra mit Vindauga-tæppe blev ved med at køre rundt i mit hovede efter at jeg strikkede det første tæppe, og det krævede […]
[…] Read this post in English […]
[…] my Vindauga blankets, both the large size and baby size, I use kitchener stitch to assemble the panels because that is completely invisible […]