The easiest way to save Japanese indigo is to dry the leaves. This is also the only option, really, when you grow a small amount of plants.
~
In traditional Japanese dyeing with Japanese indigo, the harvested leaves were composted (fermented) in a very specific way, sprinkling the leaf mass with water and turning it over. The timing had to be just right, and Jenny Balfour-Paul writes in “Indigo, Egyptian Mummies to Blue Jeans” that the indigo farmers referred to the packing of the leaves as “putting the baby to bed”. Every time the leaf mass was turned over, sacrifices of rice wine were made to Aizen Shin, the god of indigo.
Composting Japanese indigo was serious business – a difficult and big undertaking. The composting process can only get going if the leaf mass is sufficiently large, on the order of 100’s of kilos (or several hundred pounds). The end result were composted leaves that contained a higher percentage of indigo than the fresh ones. This mass is known as sukumo.
People who only grow a few plants (like I do) have to find a different method. Having read about it on Deb McClintock’s page, I decided to dry my Japanese indigo leaves last year. And I did manage to do so after some trial and error.
The dry leaves look like this:
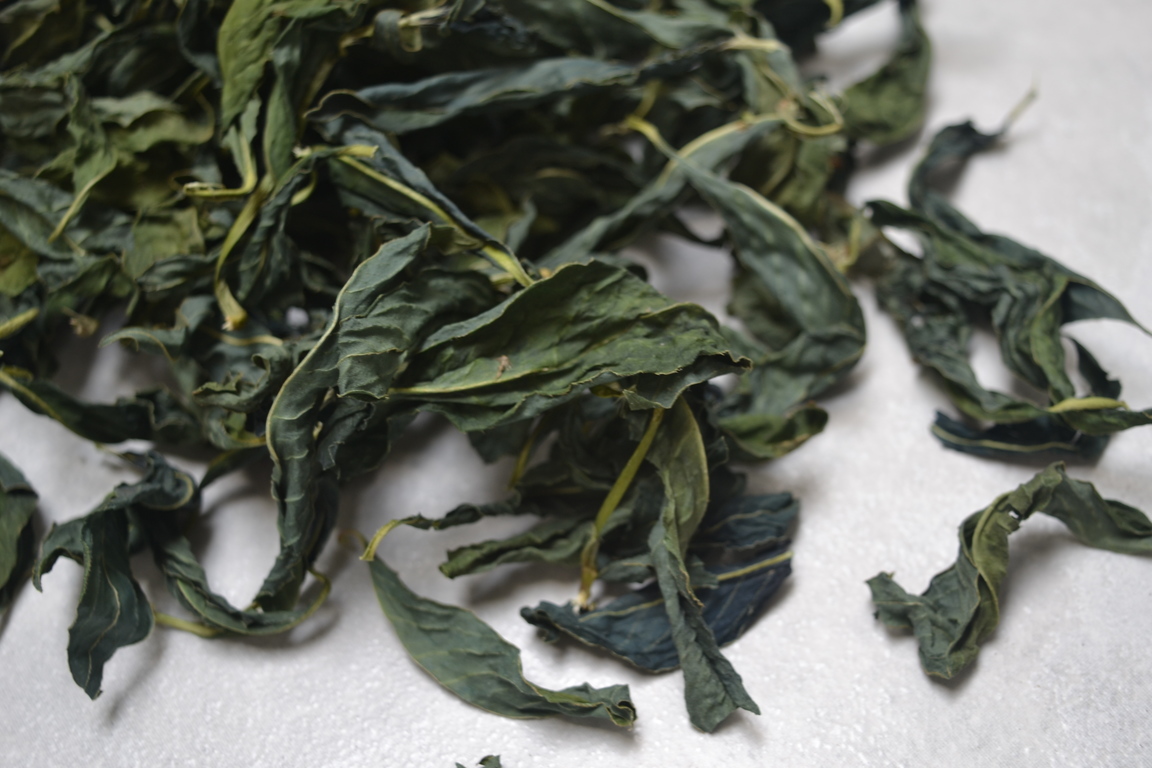
Some of the leaves look a bit blue, and that does make you think there’s indio. I’ve been wondering why drying the leaves would work (the must have been good reasons for the traditional sukumo method) and I’ve come up with the following story:
In living leaves there’s no indigo, only a precursor called indican. Here, the meaning of the word precursor is a molecule that can undergo some reaction(s) that produce indigo.
Indican production is thought to be a defense mechanism for the plant. In living leaves, the indican is primarily found in a compartment within the cell called the vacuole (shown by a Japanese team of researchers in this paper).
The plant cell also contains enzymes that are able to break down indican, producing indoxyl and sugar, but these enzymes are found in other compartments of the cell.
When you pick leaves and dry them, cell membranes will break because of the loss of water. So at some point, indican and enzymes from other parts of the cell will mix, and indoxyl is formed. When two molecules of indoxyl combine, blue indigo is formed.
I used Deb McClintock’s version of John Marshall’s method but I fiddled about quite a bit, finding my way to do it. The main change is that I didn’t discard the yellow dye, so I get a green-teal instead of blue.
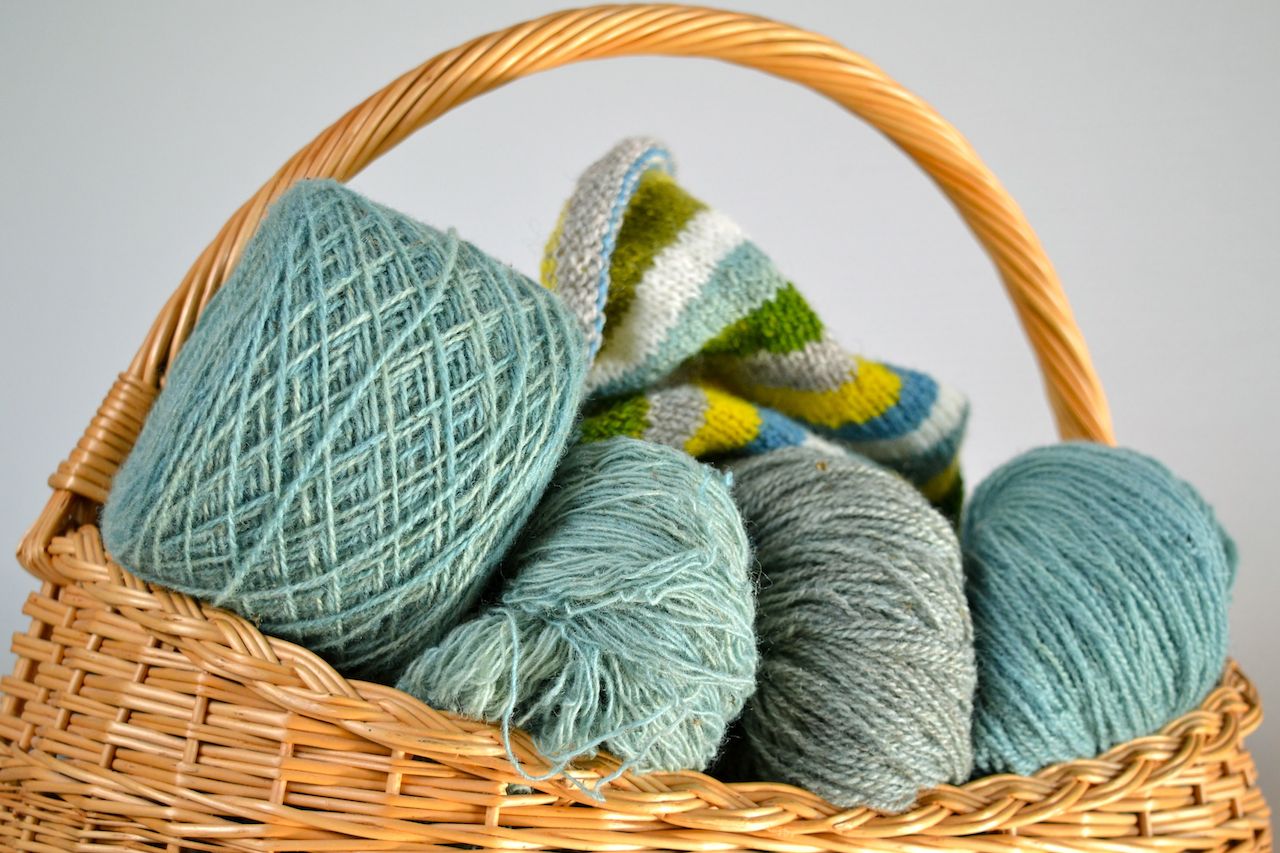
For my first attempt, I used 50 grams of dried leaves to dye 3 100-gram skeins of wool. The vat stopped working early on, so I added a bit of this, a bit of that. That lead to no recipe, but the result was completely fine.
My next attempt was made during an indigo workshop I taught a while ago, and I know it was hugely optimistic to bring such a difficult project. That vat only gave a slight hint of mint green, but at least we got a lot of brilliant blues from the ordinary indigo vats.
Afterwards, I started thinking that the vat may have gone wrong because the temperature was too low. This also makes sense when thinking about this failed experiment where I kept leaves lukewarm for a longish time.
High temperature during part of the vat preparation seems to be important, and that is a part of the method I ended up with for my third attempt:
First, I simmered 25 grams of dried leaves in water (enough to cover them) for 20-30 minutes. It wasn’t a rolling boil, but some bubbling going on.
To dye blue, the first water should be discarded and new water poured on the leaves. I did not do that, so I kept the yellows from the leaves.
I added 5 grams of sodium dithionite and about 1 tablespoon sodium carbonate. Check that pH is 9, and add more sodium carbonate if it isn’t.
Then, I simmered the vat for 15-20 minutes. It seems wrong to boil a vat after adding reducing agent and base, but in my attempt where I didn’t boil it at this step, it didn’t work.
I took the pot off the heat and added another 5 grams of sodium dithionite. I let it sit until the temperature was 40-50 C, then strained the leaves out. For my first attempt, I left the leaves in to get as much out of them as possible, but that is not a good idea. At this point, they are quite slimy and stick to the yarn.
When the temperature was 40-50 C, I put the pot on gentle heat to stay at that temperature. At this point, the vat is ready for use. I dipped a 100-gram skein of wool 3 times, and it turned a nice teal.
I’m impressed by the dye content of the leaves. 50 grams of dried leaves gave nice color to 300 grams of yarn, and 25 g gave a brighter color to 100 grams of yarn. My last vat was not exhausted, it had turned dark the next day because the indigo had been oxidized. I didn’t have more yarn on hand, but the vat could have given light shades on another skein.
But I’ve saved the best for last: light fastness. I tested light fastness of the first skein from the 50-gram vat from July 1st to September 1st. The left side was covered and not exposed, right side was exposed to the light. I can’t really see any difference between them, and that means the light fastness rivals that of indigo blue. And that is quite impressive for a green-teal color!

PS: I’m growing Japanese indigo again this year. I harvested the first leaves on September 17. this year, and they are drying. They look even bluer than the ones from last year…
[…] Read this post in English […]
My friend is an expert indigo dyer, studied in japan,however she has not dried leaves. Shedoes small vat fermeNtation.
I grew a contaiNer of indigo and harvested with THE INTENT of freezing it as she does. I forgot the bag and it dried over the winter. Thank you for This wonderful article. I’ll be able to use it after all!
Heh, not sure why my ipad did the silly caps thing.
Hi LynnAnn, I’m happy to hear that it’s useful! It seems to me that some of the other methods are able to get a larger proportion of the dye out of the leaves, but drying is so convenient when you work on a small scale!
[…] the shawl together, and we have knit one each. She made hers from a skein of Norne that I dyed with dried leaves of Japanese indigo. Here, our elegant model – my sister – shows the […]
How late can you harvest the leaves? It is mid october and mine are still out there, blue on the plants, after two hard frosts. I harvested what was left of last year’s last year quite late and still have those dried leaves in a bag. I always have dyed with the fresh leaves, too, just decided to try and find a way to use the leftovers.
Hi Jeanne,
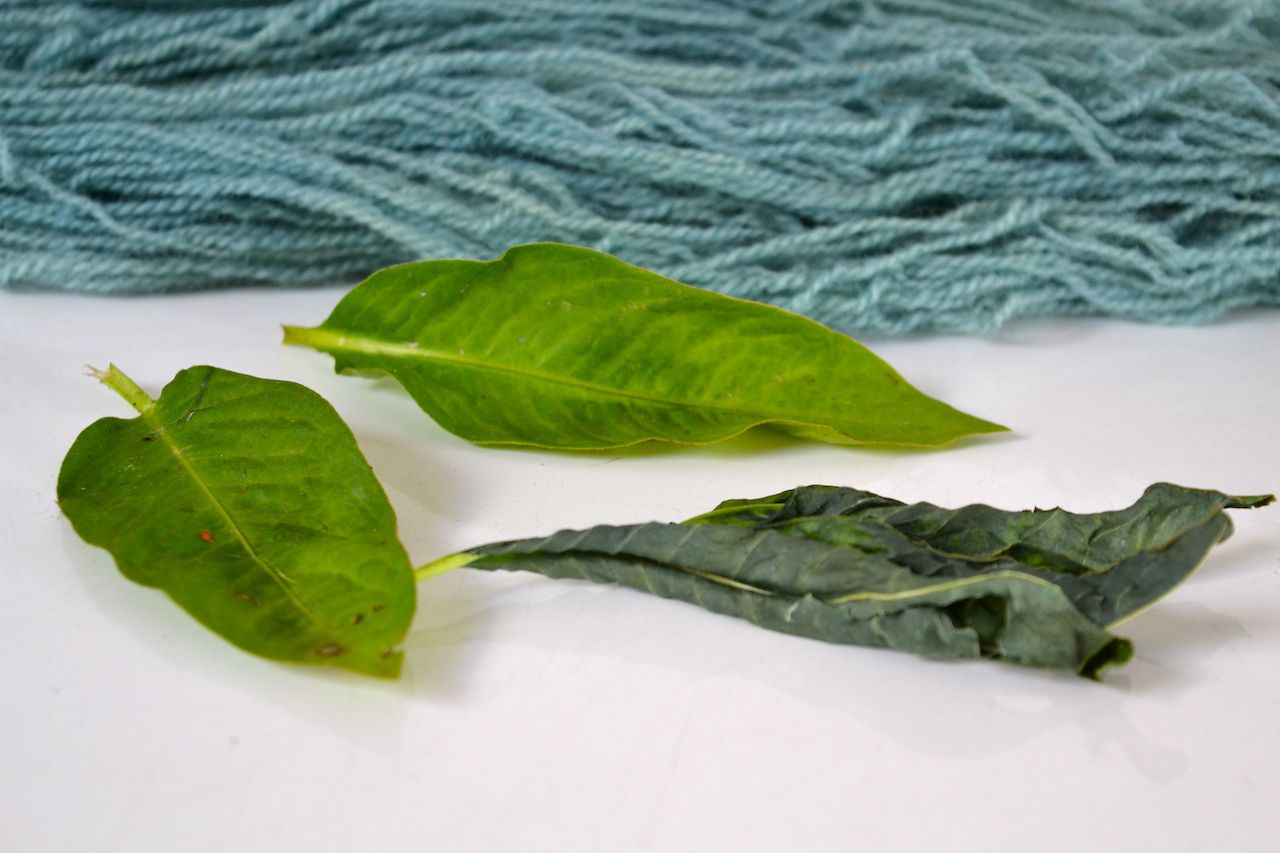
The amount of indigo in the leaves does keep falling the later in the season it gets. Flowering decreases the amount, too. I don’t know if freezing in itself decreases the amount… but the only thing to do is just try! The leaves normally turn blue-ish when dry, so that is a good indicator if there is any indigo there. But even if they don’t look so blue, you can always just try dyeing with them.
Best, Astrid
What kind of pot do you use for the dye bath/vat? Does metal type or size impact the time it takes to oxidize or color produced? This will be my first time dyeing with indigo! I usually use a large aluminium pot for other plant dyes I have done so it acts as a light mordant! I’m very excited to dye with indigo, I was worried I couldn’t use it since I had let it dry, thrilled that is not the case.
Yes, you should use a pot that can just hold the volume you want to work in with only a bit of space for the textile you put in, that way the surface of the vat will be small and reduction will be better. I don’t use aluminium pots for vats, as the base dissolves them! They are fine for other dyes, as long as the pH is reasonably close to neutral 🙂