Leaves from Japanese indigo and woad can be for a very rapid blue dye without adding anything else. The leaves just have to be fresh picked and you need to work quickly on ice!
During last summer, I experimented a bit with ice dyeing, which is a well known method for dyeing with fresh Japanese indigo.
This method is actually really simple, as opposed to just about any other method for dyeing blue. You blend the fresh leaves in ice water, strain out the plant material, put your fiber (wool or silk) in the liquid, still kept cold with ice. Everything needs to be ready before you hit the button on the blender, and you have to work quickly. But besides that, the method is easy.
From my notes (which are usually pretty good, I trained in labs for years, after all) I can see that I tried ice dyeing on August 7. 2018. I harvested branches of Japanese indigo, and ended up with 132 g of leaves:
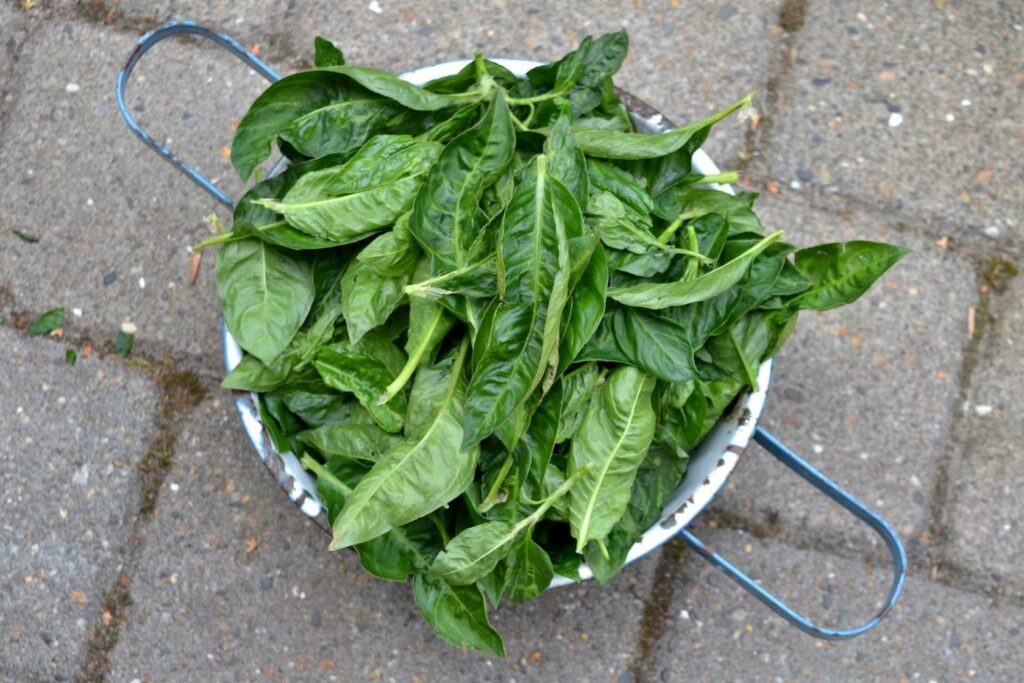
I immediately put the leaves into ice water. That buys some time, but not much!

As soon as the leaves are on ice, blend them. I used an immersion blender. Strain the leaves out, or they will stick to the fiber and they are really hard to remove. The liquid is the dye bath, and you just put your yarn or fabric in – along with some more ice. Too much ice is better than too little here.
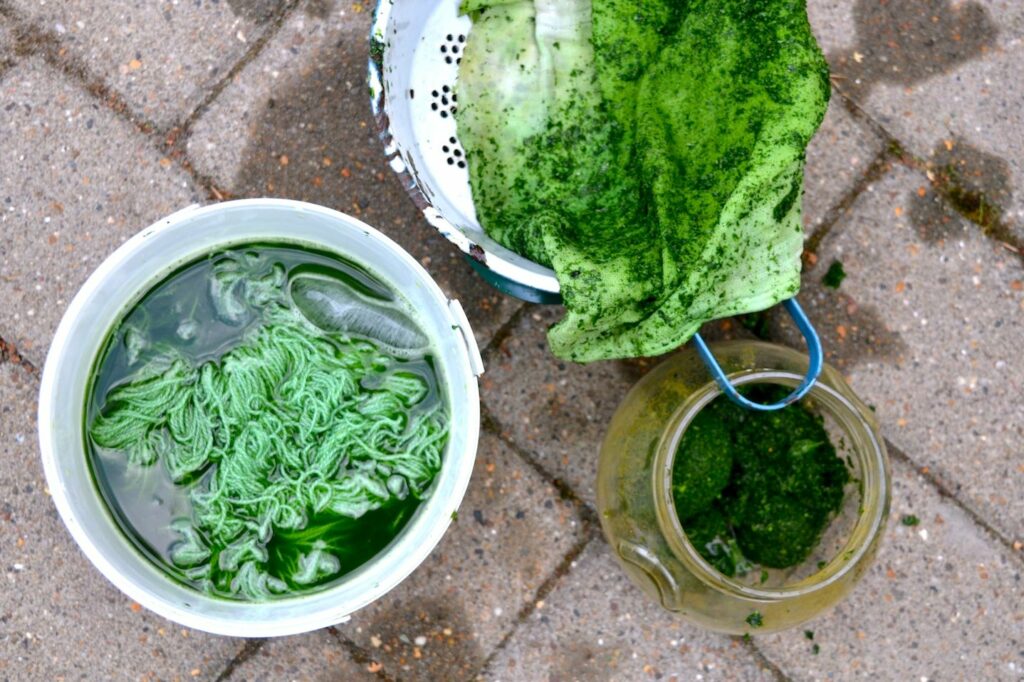
You can leave the fiber in the indigo bath as long as you like – an indigo vat has a high pH that damages wool, but this bath is neutral. I left my yarn about an hour, turning it carefully a few times.
The result: an icy blue! The green color in the bath comes from chlorophyll, and washes out. The blue from leaf indigo stays and like all other indigo, gives a very wash and light fast blue. This is my blue from 132 g of fresh leaves on 100 g of Bestla silk merino:

132 g of fresh leaf to 100 g of yarn is actually a moderate dyestuff ratio. And given that, the color obtained is quite good, I think.
On the same day in August, I also tried the ice method using woad leaves. Ice dyeing with Japanese indigo is described in many places, and I don’t know who came up with it. But I’ve never seen it used with woad, although I don’t see any reason why it wouldn’t work. I decided to try it, and used 130 g of fresh woad leaves on 25 g of Fenris pure wool. The result: it works fine! Here is the yarn dyed in my two experiments:
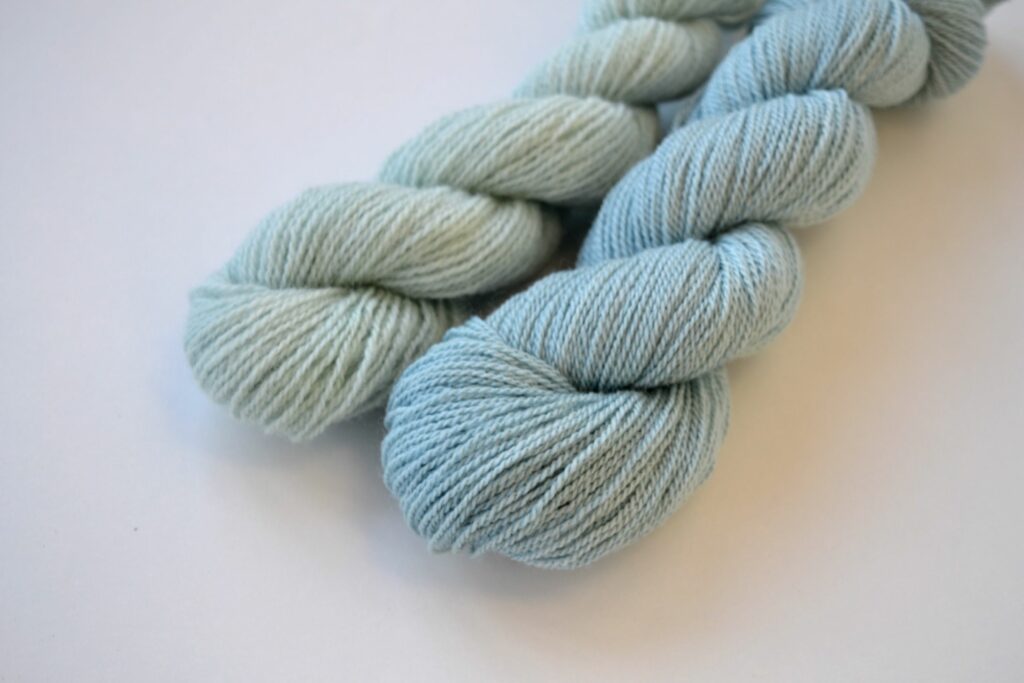
The woad blue is weaker than the one obtained with Japanese indigo using a 4 times larger amount of woad. That somehow fits fine with my expectation. The main thing is that it works, and I can just use more leaves next time.
But enough of the recipe. It’s time for a bit of theory on why this method works at all.
THEORETICAL BACKGROUND
Japanese indigo does not contain indigo – instead, it contains a compound that can be changed into indigo, a so-called precursor. The indigo precursor in Japanese indigo is indican (AKA indoxyl glucoside).
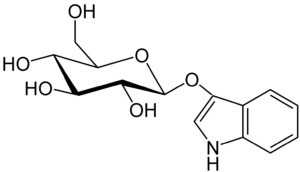
Indican is colorless. But if the plant cells are broken, then indican (found in one part of the cell) comes into contact with an enzyme (found in another part of the cell). The enzyme is called beta-glucosidase, and it is capable of breaking the chemical bond that holds together the two parts of the indican molecule. The result is a molecule of sugar (that we don’t care about) and a molecule of indoxyl:

When indoxyl comes in contact with oxygen in air, two molecules combine to form indigo, our blue dye:
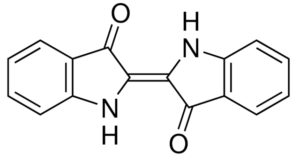
If you damage a Japanese indigo leaf, or if an animal chews on it, the whole process from indican to indigo takes place in the leaf. But when using the ice method, we are interested in delaying the whole process, and that is the reason for keeping everything on ice.
The ice makes the temperature low enough that the beta-glucosidase will not break indican down to indoxyl (or at least will do it much slower than usually). When the fiber is lifted out of the bath, the normal temperature and access to oxygen make the whole process take place, resulting in the formation of indigo. But one has to work quickly, or the blue indigo will form in the dye bath. And if that happens, it’s too late to bind it to the fiber.
The reason the method works with woad too is that woad also contains indican. But it contains much less of it than Japanese indigo does. So it fits with expectation that the metod works but gives much less blue. Woad also contains other precursors like isatan A and B. I would think that they also turn into indigo when using the ice method, but I’m not basing that belief on any hard facts.
PS: WHAT ABOUT STALKS AND LEAVES?
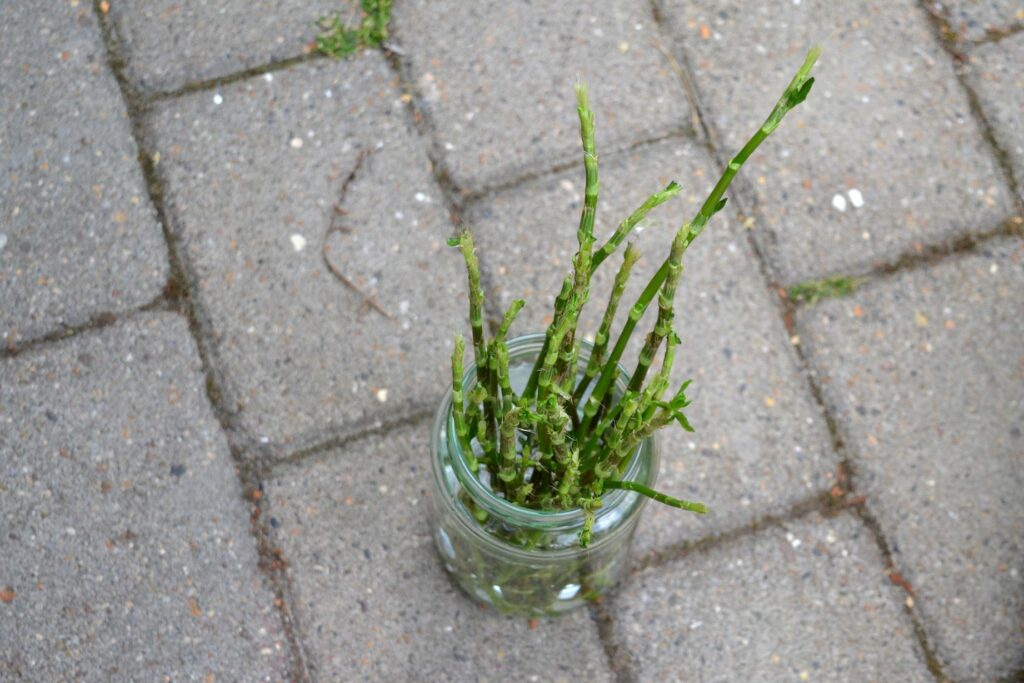
Harvesting Japanese indigo leaves directly from the plants is not practical. The easiest way is to cut whole stalks and strip the leaves off. I put the empty stalks in water and waited a few weeks, at that point they have grown new roots and leaves and can be planted again.
The leaf material that was strained out should be dried and saved. It can be used in exactly the same way as dry Japanese indigo leaves, the method described here. The blender material gives a nice blue without discarding any water, so I am guessing that the ice method removes the yellow dye component from the leaves. But it leaves behind quite a lot of blue.

Hi Astrid. Just come across your blog and this excellent article on ice dyeing with Japanese Indigo. Very good indeed and one of the best and informative sources for this process I have seen. I am looking forward to reading some of your other posts.
Thank you very much! (I just found your comment, better late than never)